GuideNovember 8, 2026 · 10 min read
How to Make a Watch Face That Changes With the Time of Day
Make a day and night watch face that changes with the time of day. A step-by-step WristForge Timeline tutorial, from sunrise sky to stars at night.
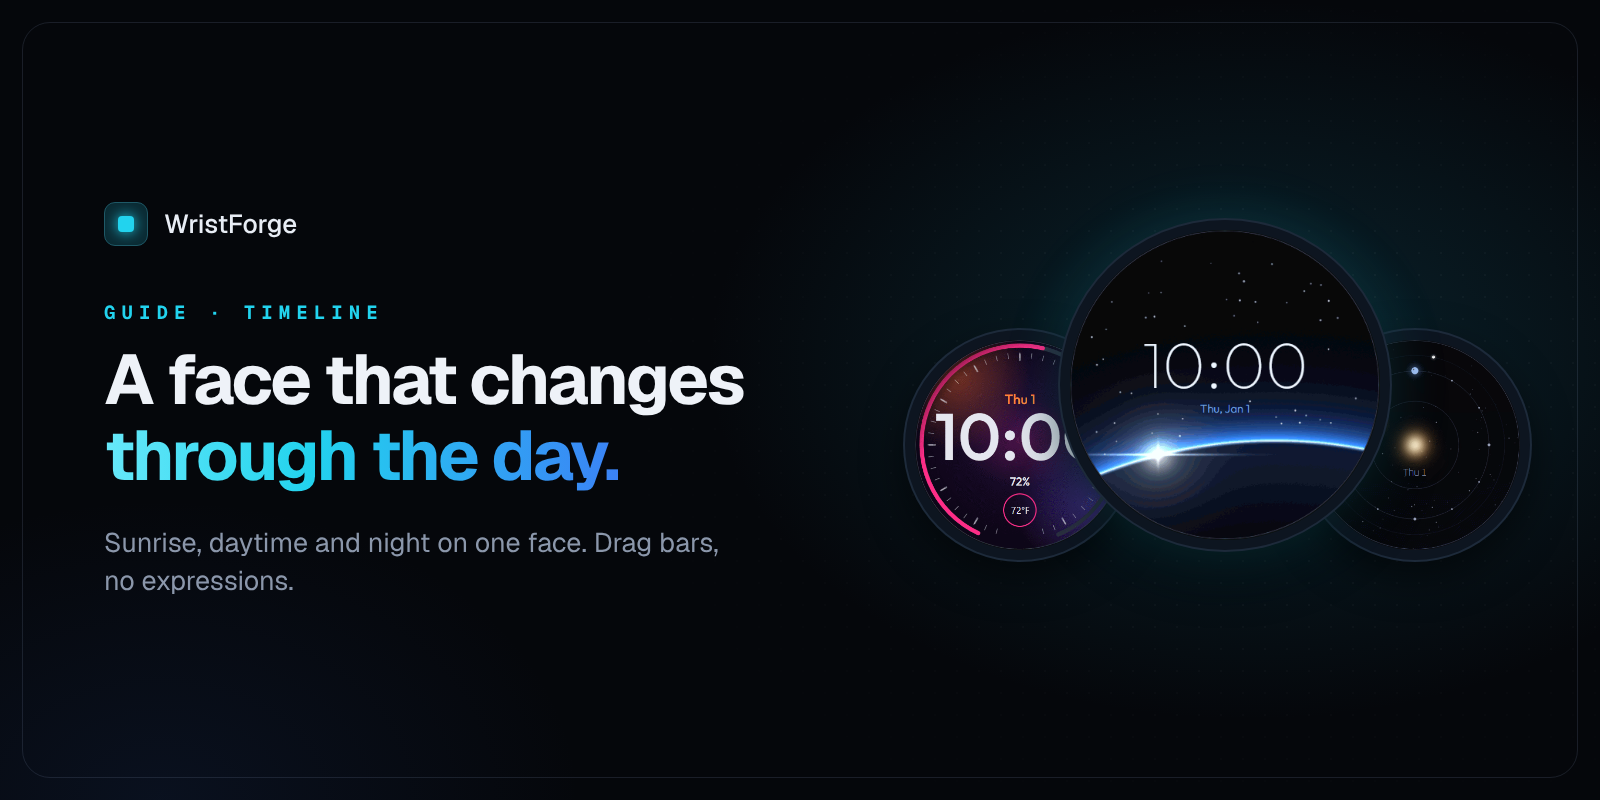
Some of the best watch faces change with the time of day: a pale sunrise in the morning, a blue sky at noon, an orange sunset, stars after dark. This guide shows you how to build a watch face that changes with the time of day in WristForge, using the Timeline window. You'll learn how windows and keyframed tracks work, then build a full day and night watch face step by step, test a whole day in a minute, and see what runs on the real watch.
Most watch face tools make you build this out of conditions typed into fields. In WristForge you drag bars and keyframes on a 24 hour timeline, and the face in the Scene follows along as you scrub.
What the Timeline can do
The Timeline gives you two tools:
- Windows turn an object on for part of the day and off for the rest. A sun from 6 AM to 7 PM, a moon the rest of the time. Windows can fade in and out instead of cutting, and can swap an object's picture for part of the day.
- Property tracks animate a value smoothly across the day with keyframes: opacity, position x, position y, scale, rotation and tint. Each keyframe has its own easing.
Windows answer "is it showing right now?" Tracks answer "how does it look right now?" Most time-of-day faces use both.
Open the Timeline window
In the editor, choose Window ▸ Timeline… or press Ctrl+T. You can also click the ⧉ Timeline button on the Scene's time bar.
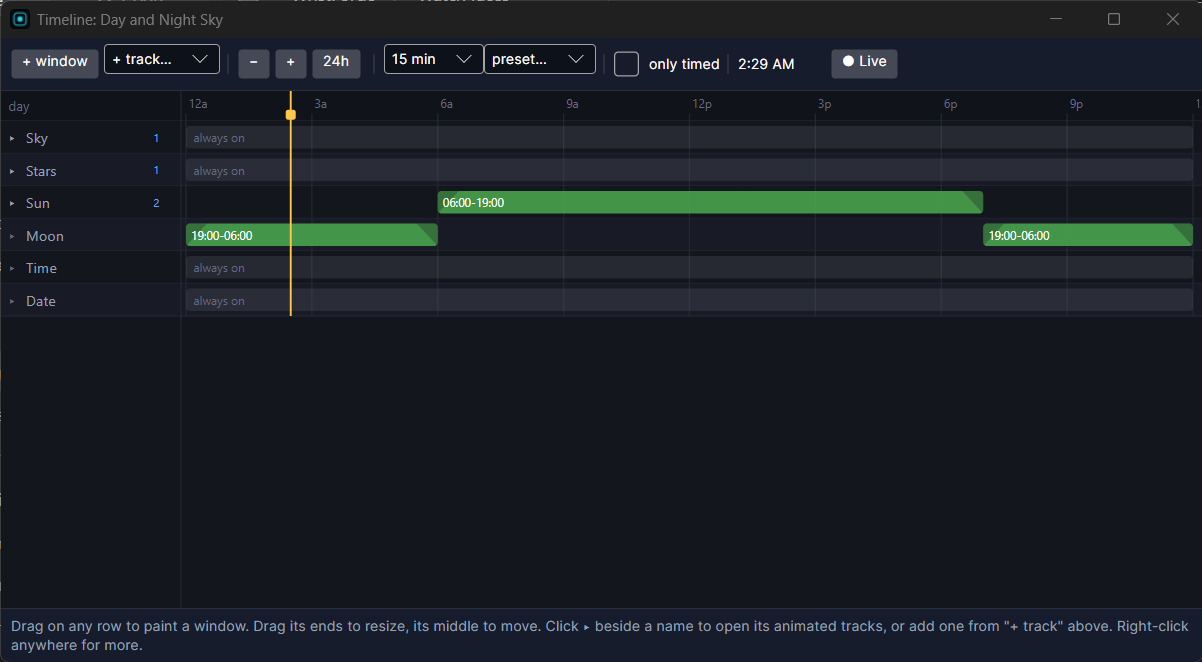
The Timeline opens as its own window, so you can keep the Scene in view beside it. That's the point: you scrub the playhead and watch the face react. Every visible object gets its own row, in draw order, so you can see how a background's timing lines up with an icon's. Groups don't get a row, since they have nothing to draw; put the timing on the objects inside them.
The Timeline's playhead, the Scene's time bar and the Simulate tab's time are one shared clock. Move one and the others follow. Click ● Live to give the face the real clock back.
Show and hide layers by time of day
To make a window:
- Drag along an empty part of an object's row. The window appears as you drag. Or select the row and click + window to add one around the playhead.
- Drag an end to resize it, or the middle to move it. Ctrl+drag makes a copy.
- Click the window to see its details: start and end times you can type, fade in and fade out in minutes, a name, and mute.
Drags snap to 15 minutes, or to 1 minute while you hold Shift. Ctrl+scroll zooms. Ctrl+Z undoes right in the Timeline.
A few things worth knowing:
- Windows can cross midnight. Draw 10 PM to 4 AM like any other and it wraps.
- Fades turn a hard cut into a crossfade. 0 minutes is a cut.
- Invert (right-click the row) shows the object everywhere except inside its windows.
- Mute keeps a window but ignores it, handy while you compare two ideas.
- Art swap: drop a picture from the Project panel onto a window's bar, and the object shows that picture during that window. One object can carry a morning, afternoon and night version of the same art. Invert is turned off on an object that swaps art, since "show a different picture here" and "show nothing here" contradict each other.
More detail: Time of Day Windows.
Animate opacity, position, scale, rotation and tint
To add a property track, select an object's row and pick a property from the + track… list (or right-click and choose Add animated track). The track unfolds under the object with two starting keyframes.
- Click on an empty part of the curve to add a keyframe, and drag it in the same motion. A new keyframe takes the value the curve already has there, so adding one never moves anything.
- Drag a keyframe left and right for time, up and down for value. Hold Shift for fine control.
- Click a keyframe to type its time and value, or its color for a tint track.
- Easing sets how the curve arrives at each keyframe: linear, ease in, ease out, ease in-out or hold. Hold doesn't blend at all: it keeps the previous value and jumps, for a clean swap.
Position, scale and rotation are offsets from where you placed the object, so a track keeps working if you move the object later. Each track has a fixed range in the editor: opacity 0 to 1, scale 0 to 3, rotation -180 to 180 degrees, and position -120 to 120 pixels. Scale moves both axes together. Each object can have one track per property.
The day loops. After the last keyframe, the curve carries on through midnight into the first keyframe, so you never need a duplicate key at 00
.More detail: Animating with Property Tracks.
Worked example: a day and night sky watch face
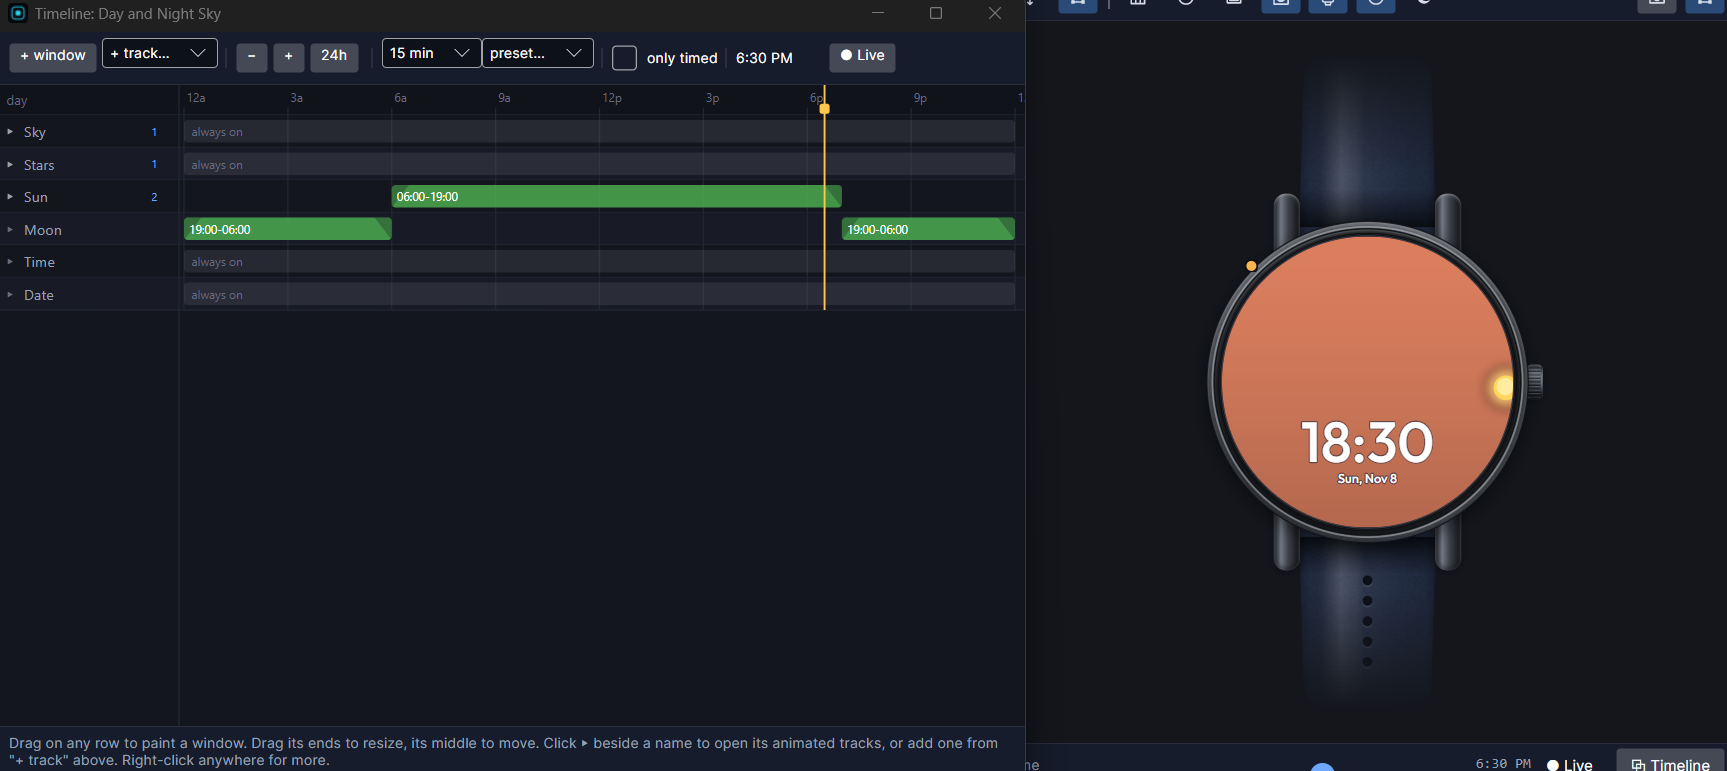
Let's build a face whose sky goes from sunrise to day to sunset to night, with a sun that arcs across the sky, a moon after dark and stars that fade in. Start a new watch face project (see Your First Watch Face) and add these Image objects, bottom to top:
| Object | Art | What drives it |
|---|---|---|
| Sky | A full-screen, mostly white or pale gradient | Tint track |
| Stars | Small white dots on transparent | Opacity track |
| Sun | A small sun | Window, plus position x and y tracks |
| Moon | A small moon | Window |
| Time and date | Digital Clock and Date Text | Nothing: always on |
Step 1: Color the sky with a tint track
Light art takes a tint cleanly, which is why the sky picture is pale. Select Sky, add a tint track, and set these keyframes, all ease in-out:
| Time | Color | Look |
|---|---|---|
| 00 | #1B2440 | Night |
| 05 | #1B2440 | Still night |
| 06 | #F4A26B | Sunrise |
| 08 | #8EC9F0 | Day |
| 17 | #8EC9F0 | Still day |
| 19 | #E7744A | Sunset |
| 20 | #1B2440 | Night |
Colors blend between keys, so the sky drifts from one to the next. Scrub the playhead across the day and the Scene follows.
Step 2: Make the sun rise, arc and set
Select Sun and place it at the middle of the sky where you want it at noon.
- Drag a window on its row from 06 to 19. Give it 30 minutes of fade in and fade out.
- Add a position x track. Set keys at 06 = -120 and 19 = 120, both linear. The sun now crosses from left to right.
- Add a position y track. Set 06 = 40, 12 = -60 with ease out, and 19 = 40 with ease in. Negative is up, so the sun climbs to noon and sinks toward evening.
The x track loops back overnight, but the window has the sun hidden then, so you never see it.
Step 3: Bring out the moon
Select Moon and drag a window from 19 to 06. It wraps past midnight. Add 30 minute fades so the moon and sun hand over gently. (You could also give the moon the same 06
to 19 window as the sun and turn on Invert.)Step 4: Fade the stars in and out
Select Stars and add an opacity track: 04
= 1, 06 = 0 (ease out), 19 = 0, 21 = 1 (ease in-out). The stars stay out all night and fade with the light.Step 5: Keep the time readable
Put the Digital Clock and Date Text on top with no timeline at all. Check them against both the brightest noon sky and the darkest night. If they disappear against one, give the text an outline (see Text) or use a color that works on both.
Test a whole day in one minute
You don't have to wait 24 hours to see your work.
- In the editor: the ⏱ Timeline toggle on the Scene's header (on by default) plays windows and tracks while you design. Turn it off to see everything where you placed it while you line things up. An object outside its window is drawn faint, not hidden, so you can still select it.
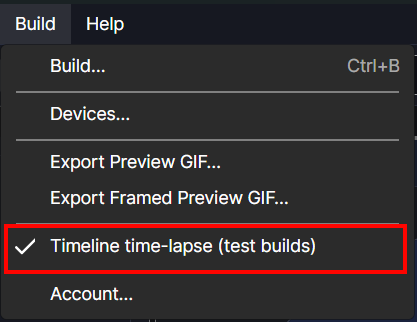
- On your watch: turn on Build ▸ Timeline time-lapse (test builds), and the next build plays a whole day in one real minute on the watch, with a progress bar along the bottom. The Digital Clock and Analog Clock hands still show the real time, so a time-lapse build is easy to spot.
Turn time-lapse off before you build anything to share. It stays on for every build until you do. More: Watching and Testing the Timeline.
(Note: Timelapse setting is moving to the Build Window -> Debug APK soon)
Show things by real sunrise, weather or battery
The Timeline works on the clock. For anything else, Images, Text and Digital Clocks have a show when row in the Inspector. It hides the object unless a real watch value meets your condition: weather is daytime, weather condition or temperature, battery, heart rate, steps, tilt, moon phase, unread notifications, AM/PM and more.
Weather is daytime comes from the watch's weather data rather than a fixed hour, so it can track the real day and night where the wearer is. That suits a small sun or moon icon. It relies on weather data, so the clock-driven Timeline is the steadier choice for the main sky.
Ambient mode and the time of day
When the wearer isn't looking, the watch drops to ambient mode, the always-on display. New objects start hidden in ambient (except clocks and groups), and the background is hidden in ambient by default. Click the moon button at the top of the Scene to see the ambient look, and use each object's Ambient dot in the Hierarchy to choose what stays.
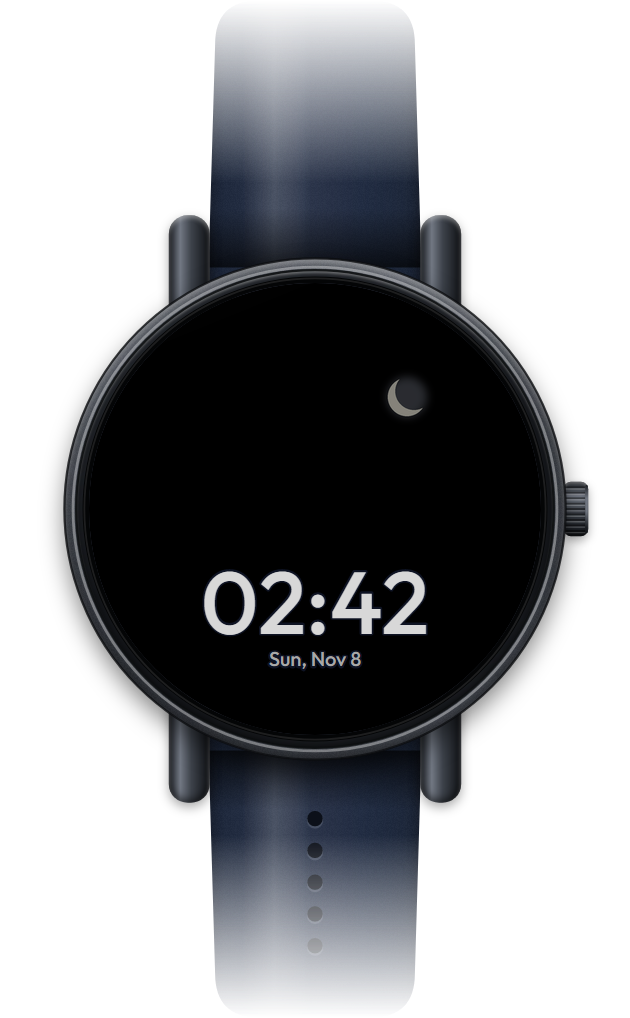
For the sky face, a good ambient look is the time and date, plus the moon if you like it, and nothing else. Google's guidance keeps ambient faces to roughly 15 percent lit pixels.
Timeline tracks keep running in ambient, because a slow time-of-day curve barely changes from one minute to the next. Per-second effects like a pulse freeze. See Ambient Mode.
What runs on the real watch
Windows, fades and property tracks are built into Google's Watch Face Format, the format Wear OS faces run in. Windows become conditions on the hour and minute, fades and tracks become transforms, and easing is worked into the math, so it all runs on the watch itself without an app in the background. The Timeline has been checked on real Wear OS hardware.
A few limits to plan around:
- If one object has several faded windows, the first faded window's timings are used for all of them. Give each faded window its own object if the timings differ.
- Scale is one value for both directions.
- Watch faces are for Wear OS watches. Apple doesn't allow third-party watch faces on Apple Watch.
FAQ
How do I make a watch face that changes from day to night?
Put the day and night art on separate objects and give each a window in the Timeline (Ctrl+T), with fades for a smooth handover. Or use one object with an art swap per window, or a tint track that blends the colors across the day.
Can a window go past midnight?
Yes. Drag it from, say, 22
to 04 and it wraps.Will the animation drain the battery?
Tracks are part of the face itself, written in Watch Face Format, not a separate app running in the background. As with any face, keep the ambient look sparse, as Google recommends.
Can I follow the real sunrise and sunset?
The Timeline uses fixed hours. To follow the weather data's day and night instead, use show when ▸ weather is daytime on an Image or Text object.
Do I need to know Watch Face Format to use this?
No. You drag bars and keyframes, and WristForge writes the Watch Face Format for you.
Can I import timing from Watch Face Studio?
Yes. Conditional Lines from a Watch Face Studio project come in as Timeline windows. See Import Watch Face Studio projects.
See one, then make your own
Solstice on Face Hub is a finished example: the sun rises on the left, arcs overhead and sets on the right, then the moon takes over under the stars. For a seasonal spin, look at cozy and spooky seasonal faces. Then download WristForge, open the Timeline, and start with a sky.