GuideOctober 28, 2026 · 12 min read
How to Make a Wear OS Watch Face Without Coding
Learn how to make a Wear OS watch face without coding: time, date, complications, ambient mode and color styles, then test it on your Galaxy or Pixel Watch.
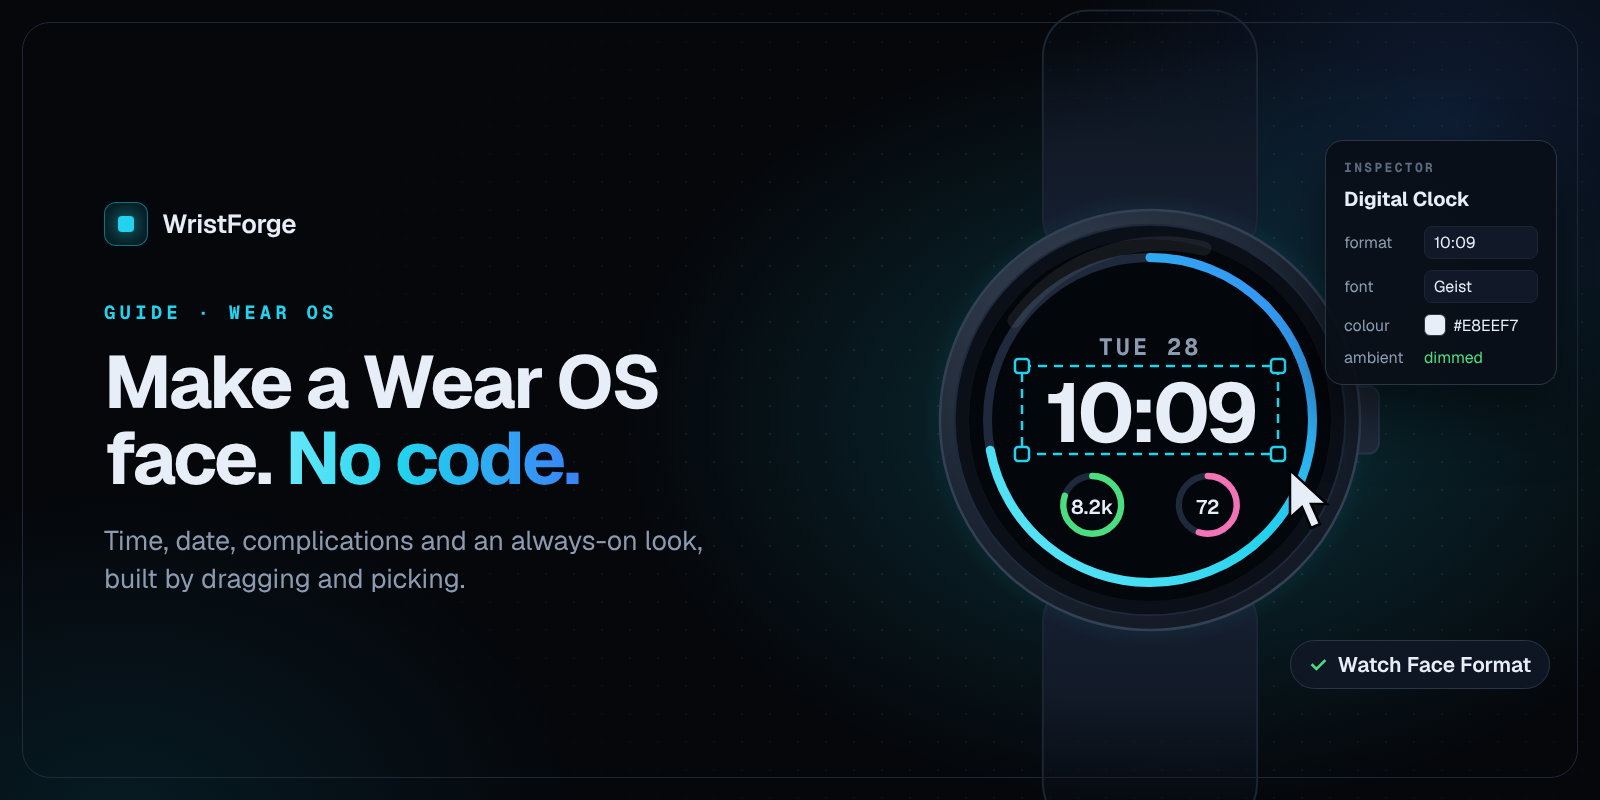
You can make a Wear OS watch face without coding, and you don't need to be a designer either. This guide walks you through a complete face in WristForge, a free editor for watch faces, apps and games: the time, the date, complication slots the wearer fills, live readouts like battery and steps, an always-on look, and color choices the wearer can switch on their own watch. At the end you'll have a custom watch face running on your own Galaxy Watch or Pixel Watch.
Every step uses the real menu and Inspector labels, so you can follow along with the editor open. If you haven't installed it yet, grab it free from the download page.
What is Watch Face Format, and why does it matter?
Before you start, it helps to know what you're building.
Watch Face Format (WFF) is Google's format for Wear OS watch faces, developed together with Samsung. A WFF face isn't an app full of code. It's a description of the face: which images go where, which text shows the time, what dims in always-on mode. The watch reads that description and draws the face itself.
That matters for three reasons:
- Battery and speed. Wear OS does the drawing, so a WFF face benefits from Google's own rendering work, including in always-on mode.
- Fewer updates. Google notes that WFF faces need fewer updates than faces built on the older code-based libraries, because platform fixes reach them automatically.
- It's now the only option on Google Play. Google stopped accepting new code-based ("legacy") watch faces on January 27, 2025. Since January 14, 2026, legacy faces can't be updated on Play and can't be installed from Play on any Wear OS device. If you want your face on Play, it has to be WFF. You can read Google's announcement on the Android Developers Blog.
WristForge builds every watch face in Watch Face Format. You design visually, and the editor writes the format for you.
WristForge currently builds faces with Watch Face Format version 4, which Google lists as needing Wear OS 6 or newer. Check your watch's software version in its settings before you test on it.
Step 1: Create a new watch face project
- Open WristForge Hub and click New Project….
- Choose Watch Face.
- In the template gallery, pick Blank. The other templates (Analog, Digital, Fitness, Hybrid) are finished faces you can take apart later.
- Type a name and click Create.
A short guided tour runs the first time you open a face. Replay it any time from Help, then Tours.
The editor has three main areas:
- Hierarchy (left): every object on the face, one per row. Objects lower in the list draw on top.
- Scene (middle): the face as it will look on the watch. Click to select, drag to move.
- Inspector (right): every setting for whatever is selected.
Use Import from Watch Face Studio… in the Hub instead of New Project. Your .wfs project opens as a WristForge face you can keep editing. See importing Watch Face Studio projects.
Step 2: Set the background
Click an empty part of the face. The Background settings let you pick a solid color, a two-color gradient or an image.
Dark backgrounds read well on a watch and are kinder to the battery on OLED screens. Leave the background's ambient setting at 0 for now: that hides it when the watch dims, which is what most faces want.
Step 3: Add the time (Analog Clock or Digital Clock)
Every face needs to show the time clearly. It's also one of Google's quality rules for watch faces on Play. Click Add Object above the Hierarchy and pick one of these.
Digital Clock
Digital Clock shows the time as text, drawn by the watch so it's always correct. In the Inspector:
- format: leave it on Auto, match device (h) so the face follows the wearer's own 12 or 24 hour setting. There are also fixed 12 and 24 hour formats, versions with seconds, and one-part formats (Hour only, Minute only, AM/PM only) for styling the hour and minutes separately.
- colour, font and font size: go big. A watch is read in a glance. A font size of 0 means automatic.
- outline: adds an outline around the digits, with its own outline colour and outline width.
Analog Clock
Analog Clock comes with three child objects in the Hierarchy: Hour Hand, Minute Hand and Second Hand. Each hand is an Image, so you select it to change its picture, tint or drop shadow.
Useful clock settings:
- smooth sweep: the second hand glides instead of ticking. It looks great but uses more battery.
- Fit hands to dial: re-centers all three hands after you resize the clock.
- hand styles: extra sets of hands the wearer can choose between on the watch.
Draw hand images pointing straight up (12 o'clock), with the pivot at the center. New watch face projects include a starter set of hands.
Step 4: Add the date
From Add Object, choose Date Text and drag it under the clock. Its format row offers options like Mon, Jan 5, Jan 5, Day only (5) and Weekday only (Mon).
A single Date Text stays on one line on a real watch. For a stacked date, use two objects: one set to Month only (Jan) and one to Day only (5).
Step 5: Add complications the wearer can choose
A complication is a small slot on the face that shows data from somewhere else: the weather, the next calendar event, a sunrise time, a shortcut to an app. You decide where the slot sits and how it looks. The wearer decides what goes in it, from their watch's own face editor.
Add Object has five complication shapes:
| Shape | Can show |
|---|---|
| Complication Circle | Short text, range value, small image, icon |
| Complication Small Box | Short text, range value, small image, icon |
| Complication Large Box | Long text, range value, small image |
| Complication Line | Short text only |
| Complication Edge | Follows the curve of the bezel |
There's also Complication Edge (Duo) and (Quad), which add two or four edge slots already in position.
With a complication selected, check these Inspector rows:
- shows: the main kind of data the slot accepts. Tick the also options to accept more kinds, which widens what the wearer can pick.
- starts with: what the slot shows right after install, such as watch battery, step count or next event. New slots start on Empty (wearer picks).
- fixed: appears once starts with is set. Tick it to stop the wearer from changing that slot.
The Scene fills each slot with sample data, so you can judge the layout before it's on a watch.
Google's watch face quality rules allow no more than 8 complication slots. WristForge counts them the same way, and several readouts below don't use a slot at all.
Step 6: Add battery, steps and heart rate readouts
Some data doesn't need a complication, because Watch Face Format gives it to the face directly. These are separate objects in Add Object:
- Battery Level
- Step Count
- Heart Rate
- Weather, Moon Phase and Notification Count
Each one has a style row. Text shows a reading like "82%". Arc, Bar and Circle turn it into a gauge.
The difference matters on the watch:
- Text style builds as a complication slot that starts on that data source. It uses one of your eight slots, the wearer can tap it, and they can swap it for something else.
- Arc, Bar and Circle are drawn by your face from the live value. They don't use a slot, and the wearer can't swap them.
A battery ring around the edge is a classic choice: add Battery Level, set style to Arc, and give it a colour that stands out against your background. For Heart Rate gauges, min bpm and max bpm set what counts as empty and full. Step Count gauges fill toward the wearer's own step goal on a real watch.
Step 7: Design the ambient (always-on) mode
When the watch isn't being looked at, it dims and switches to ambient mode, the always-on display. Wear OS doesn't simplify your face for you, so this step is yours.
- Click the moon button (Ambient) at the top of the Scene to see the ambient look.
- In the Hierarchy, each row has an Ambient dot. Filled means the object shows in ambient. A hollow ring means it's hidden. Click to switch.
- Keep the time. Hide decoration, labels and most data.
- To make a visible object look different in ambient, open its ambient look section in the Inspector and set an ambient colour, for example plain white instead of bright orange.
New objects start hidden in ambient, except Analog Clock, Digital Clock and Groups, so a lot of this is done for you. Hide the Second Hand on an analog face, since the screen barely updates in ambient.
Google's quality guidelines say an always-on watch face should light no more than 15 percent of the screen's pixels. Thin, light text on black is the classic way to stay under it. See Ambient Mode for more tips.
Step 8: Let the wearer choose colors with Color Styles
A Color Style is a set of color choices the wearer picks from on their watch, like Ocean, Sunset or Mono. Watch Face Studio calls the same Watch Face Format feature a Color Configuration.
- Open Window, then Color Styles… and click + New style.
- Give it a clear name, then add options with + New option. Each option is one swatch the wearer sees. The default option is what a fresh install starts with.
- Select an object, find its color field in the Inspector, and use the style row under it to bind that color to your style.
- Bind as many objects as you like: the clock, a gauge, the hands. One pick on the watch changes them all.
The Simulate tab has a row for each Color Style, so you can check every option without building. Want whole-face presets? Window, then Flavors… lets one choice set several styles at once. See Color Styles and Flavors.
Step 9: Test it in Preview
Press F5 (or the Preview button). The time ticks, and readouts fill in with sample data. Press F5 again to stop. Nothing you do while previewing changes your face.
Open the Simulate tab to test the awkward cases:
- Set the time to 23 and check that long times still fit.
- Drop the battery to 5 percent.
- Switch to ambient.
- Try each Color Style option.
Then open Window, then Problems… to check the face for mistakes before you build.
Step 10: Put it on your real watch
Preview gets you close, but only a real watch shows how the screen dims and how live data looks.
- Open Build, then Build…. The first time, WristForge offers to download the Android build tools it needs (Java and the Android SDK). Say yes. It only happens once.
- Pair your watch from Build, then Devices…, over Wi-Fi or USB. You do this once per watch.
- Back in Build…, pick Debug APK and build. It installs straight onto the watch.
- On the watch, long-press the current face and pick yours.
If something doesn't work, Getting Your Face Onto a Real Watch covers the details.
Where to go next
Your face works. Now you can share it:
- Face Hub is WristForge's own watch face catalog. Build a Face Hub build, upload the .zip from your creator area on the WristForge site, and once it's reviewed, people can install it on their watch. No Google Play account needed. Browse what's already there at Face Hub.
- Google Play reaches every Wear OS owner at a price you choose. It takes more setup: a developer account, a signing key and Google's review. Our guide on how to publish a watch face on Google Play walks through it.
Want to go further with the design? Make a face that changes through the day with time-of-day watch faces, or browse every tutorial in Learn.
FAQ
Do I need to know how to code to make a Wear OS watch face?
No. Watch Face Format faces don't contain any code at all. In WristForge you place objects and change settings, and the editor writes the format for you.
Will my face work on a Samsung Galaxy Watch or Google Pixel Watch?
Yes, for Pixel Watch and Wear OS based Galaxy Watch models, as long as the watch is on a version that supports the face. WristForge faces currently use Watch Face Format version 4, which needs Wear OS 6 or newer. Check your watch's software version in its settings.
What is the difference between a complication and a Battery Level object?
A complication is a slot the wearer can fill with any data source that fits it. A Battery Level object in a gauge style is drawn by your face from the real battery value, doesn't use one of your eight complication slots, and can't be swapped by the wearer. In Text style it builds as a complication that starts on battery.
Why does my face look empty in ambient mode?
New objects start hidden in ambient to save power. Click the Ambient dot in the Hierarchy for anything you want to keep showing. The background is hidden in ambient too, unless you raise its ambient slider in the Background tab.
Can I import my Watch Face Studio projects?
Yes. Use Import from Watch Face Studio… in WristForge Hub to open a .wfs project and keep working on it.
Does it cost anything to make a watch face in WristForge?
The editor is free, and so are Debug APKs, Signed APKs for your own watch, and Face Hub builds. Building a Google Play bundle needs a paid plan. See pricing for the details.
Make your first face today
You now have everything you need to make a Wear OS watch face without coding: the time, the date, complications, readouts, an ambient look and wearer color choices. Download WristForge for free and build your first face in an afternoon.