Your First App
Build a small tap counter app, try it in Preview, and put it on your watch. One project runs on Wear OS and Apple Watch.
About 12 minutes
A watch app is a few screens of buttons and text that do one job well: count something, show a number from your server, start a timer. This tutorial builds the smallest useful one, a counter that remembers its number, so you see the whole loop before learning any single piece.
You don't need to know how to code. You need a watch only for the last step.
1. Create the project
- Open WristForge Hub and click New project.
- Pick App.
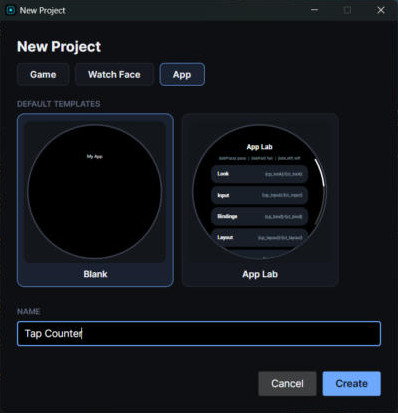
- Choose Blank, type a name and click Create.
- Pick the folder to save the project in.
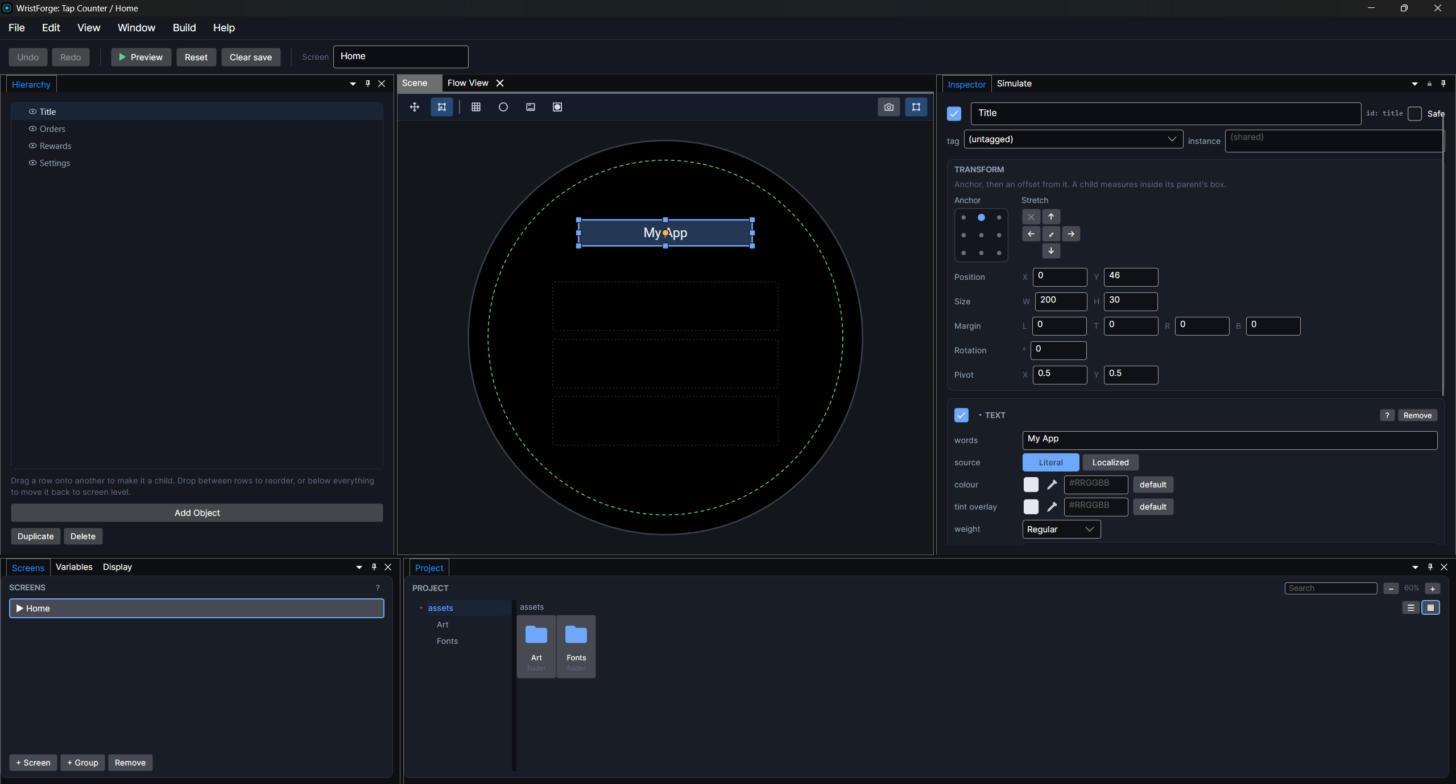
The blank app opens on a Home screen with a title and three rows. Everything on it is an ordinary object you can change or delete.
An App project is for tools and utilities. It hides the game-only parts of the editor (physics, tile maps, dialogue) so the menus stay short. Everything you learn here also works in a game.
2. Find your way around
- Hierarchy (left): every object on the screen. Lower rows draw on top.
- Scene (middle): the screen as it looks on the watch. Click to select, drag to move.
- Inspector (right): the settings of whatever is selected, including its components, the pieces that give an object a job (show text, react to a tap, buzz).
3. Make a variable
A variable is a named number or piece of text your app remembers.
- Choose Window ▸ Variables… (or open the Variables tab at the bottom left and click All variables…).
- Click + Variable and rename it from
valuetocount. Leave it a Number with scope Project, starting at 0. - Check saved is ticked (it is by default). Saved variables survive closing the app, so the count is still there tomorrow.
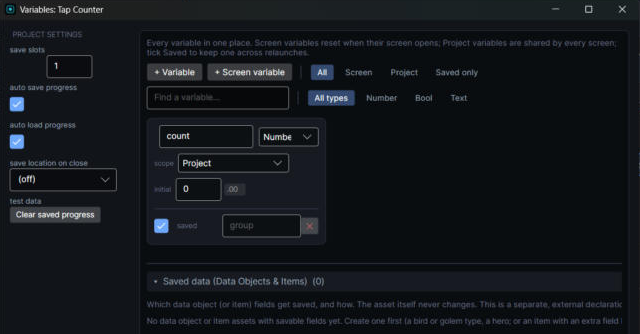
Project variables are shared by every screen. Screen variables (the + Screen variable button) belong to one screen and reset each time it opens, which suits things like a form being filled in.
4. Show the number
- Click Add Object and pick Title Text from the App group.
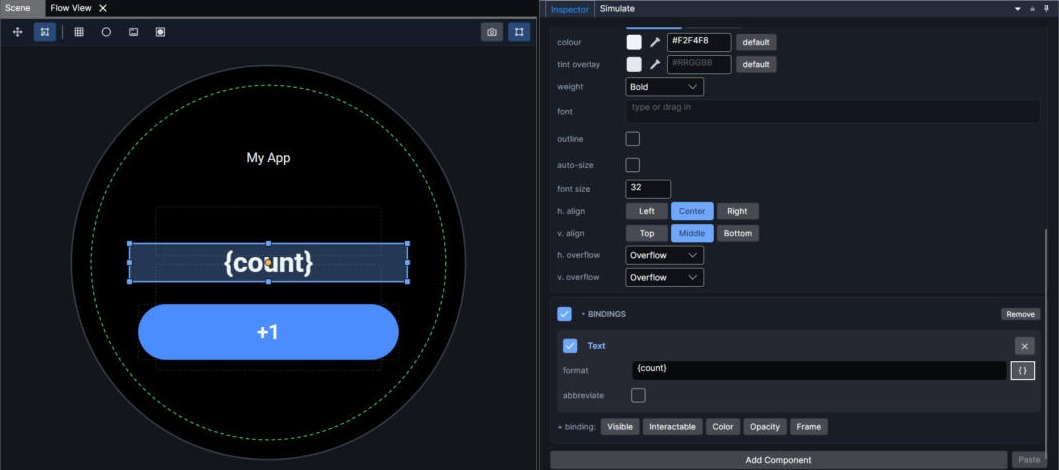
- At the bottom of its Inspector, click Add Component and choose Bind Text. It appears as a Bindings card with a Text row.
- Set format to
{count}.
Curly brackets around a variable name show its current value, and you can mix them with words: Taps: {count}. The Scene shows the format as you typed it; the number appears in Preview and on the watch.
Typing {count} into the text's own words field shows the brackets as plain text. The value only fills in through Bind Text.
5. Add a button
- Click Add Object and pick App Button. It lands in the middle of the screen, so drag it under the number (or set its Position Y to 80).
- Open the button in the Hierarchy, select its Label child and change words to
+1. - Select the App Button again. Its Tappable component holds the actions that run when it's tapped.
- Click + action. A new action starts as Add to variable; check it says
countwith an amount of 1.
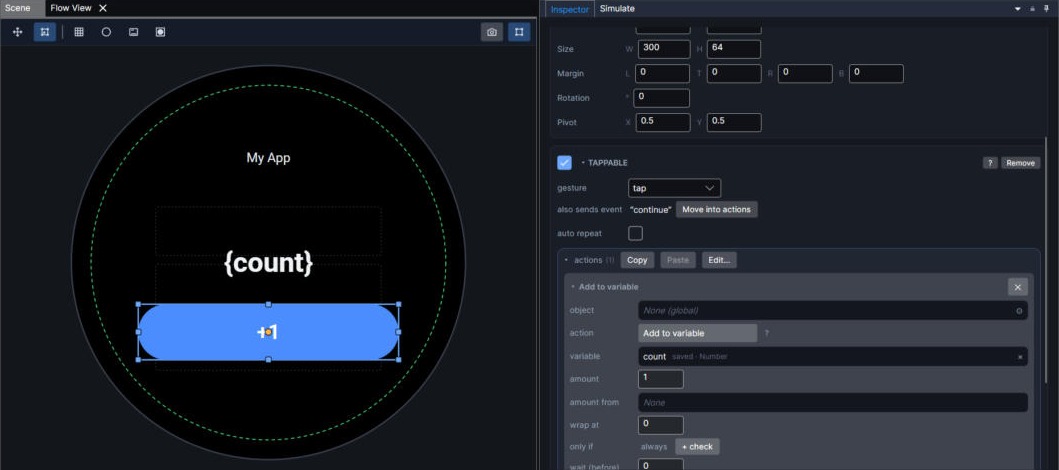
App buttons already give a short haptic tick, so a tap feels like a tap.
6. Try it
Press F5 (or Preview). Tap the button with the mouse and watch the number climb. Stop Preview and start it again: the number is still there, because count is Saved.
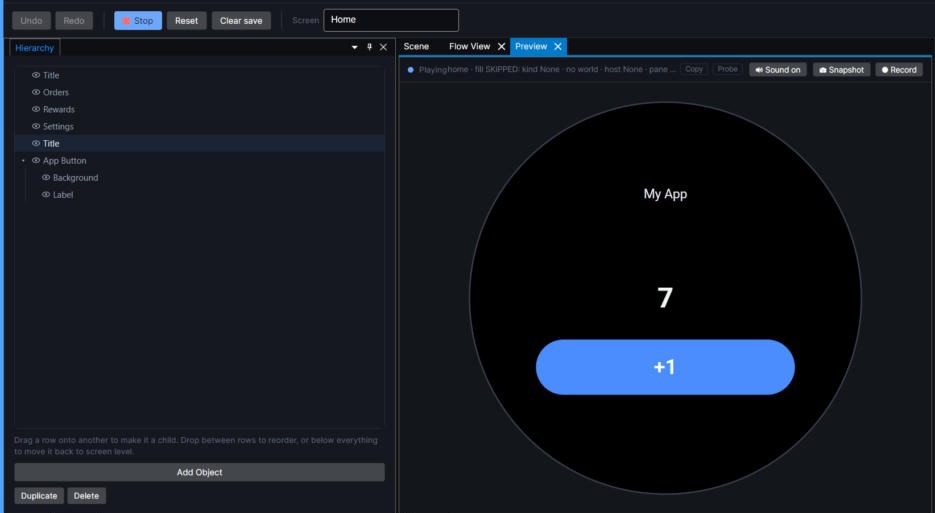
Nothing you do in Preview changes your project.
7. Put it on your watch
- Pair your watch once from Build, then Devices…. The window walks you through turning on wireless debugging on the watch.
- Open Build, then Build…, pick Wear OS and click Build for Wear OS. The build needs the Android build tools: install them once from Build tools in the WristForge Hub.
- When the build finishes it installs and opens on the watch.
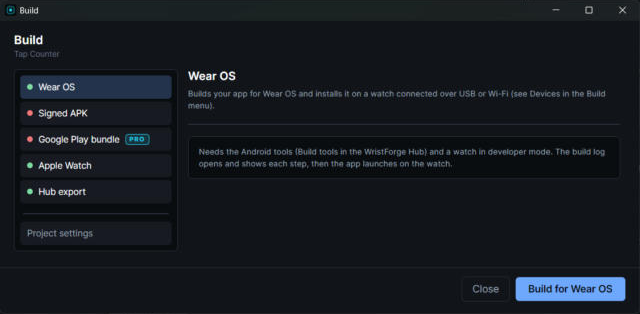
For Apple Watch, pick Apple Watch instead. That build needs a Mac with Xcode; see the Apple Watch notes in the build window.
8. Fit both watches
Wear OS watches are mostly round and Apple Watches are rectangles. One project covers both:
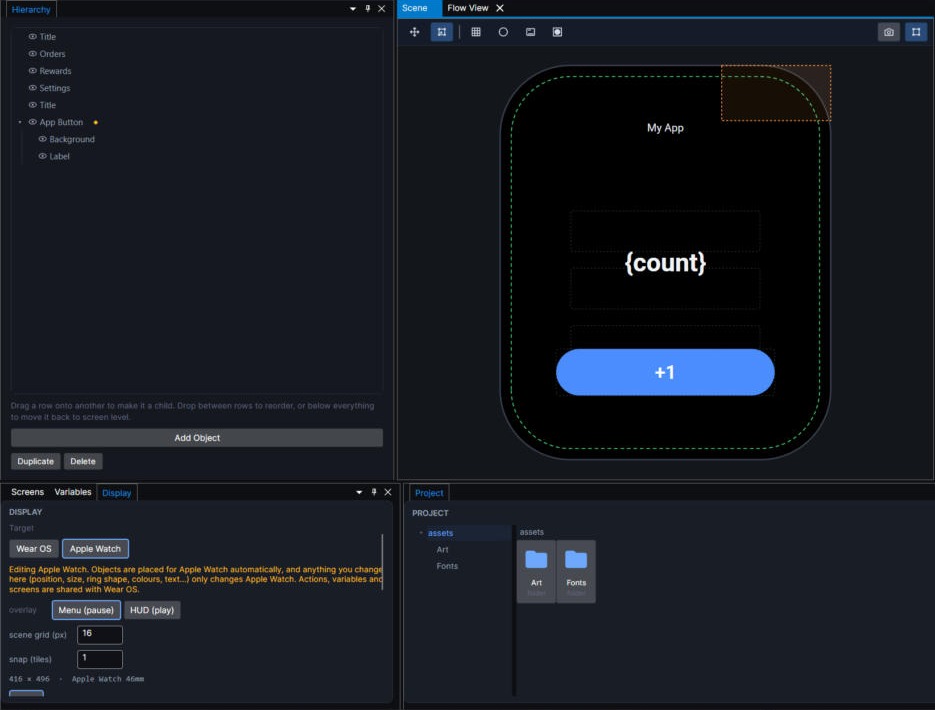
- In the Display tab (bottom left, next to Variables), the Wear OS and Apple Watch buttons switch which watch's layout the Scene shows.
- Anything you haven't moved by hand on the other watch is placed for it automatically.
- Moving or resizing an object while viewing Apple Watch only changes it there. An amber diamond in the Hierarchy marks objects with their own Apple Watch layout; right-click to revert.
Actions, variables and screens are always shared. Position, size, colours and text can differ per watch.
Next, add more screens with Screens and Navigation, format numbers and dates with Showing Data, or load live data from your server with Fetching Data from the Internet.