Fetching Data from the Internet
Call your own server or any web API with a Data Source, copy the reply into variables and lists, and handle loading, errors and offline.
About 12 minutes
A Data Source is one web request: an address, a method, and what to do with the reply. A Fetch data action runs it. It works for real in Preview, so you can build against your live server before you ever touch a watch.
1. Create a Data Source
In the Project panel, choose New data, then Data source, and give it a name like Todo. Double-click it to open the editor. You can rename it from the name box at the top.
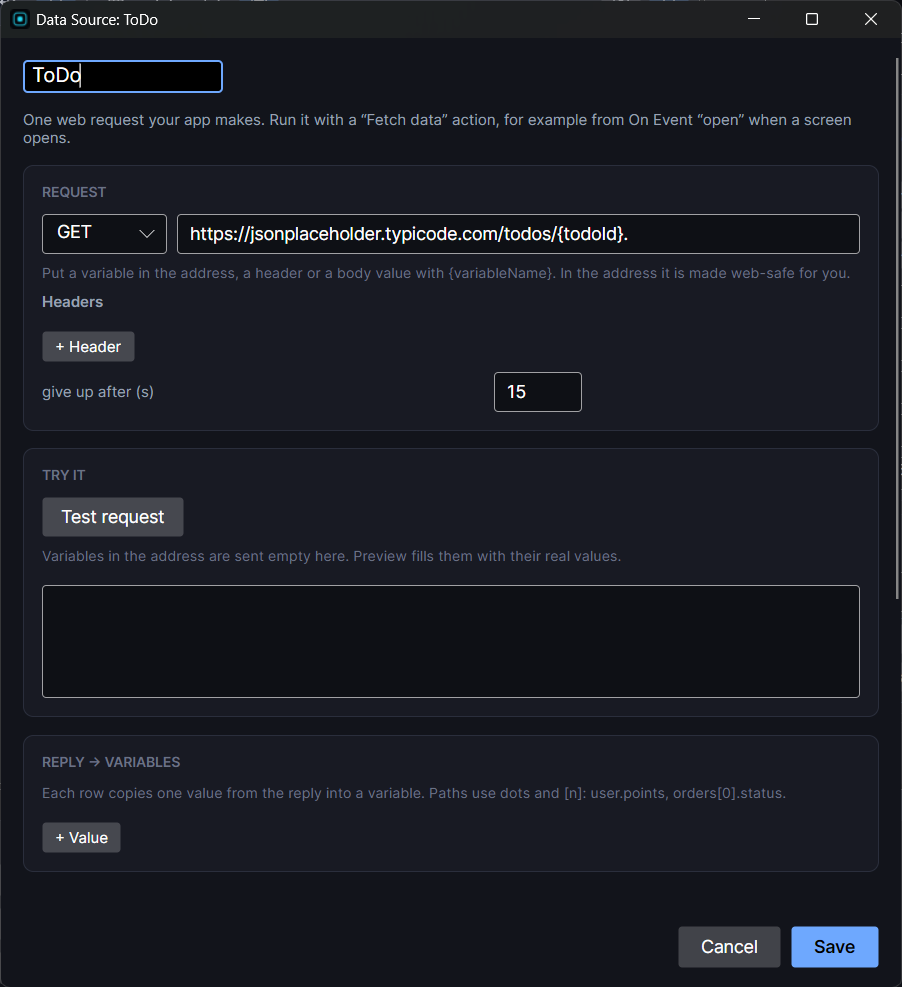
Request
- Method: GET to read, POST to send, and PUT, PATCH or DELETE if your server uses them.
- Address: the full URL. Put a variable in curly brackets and its value is filled in:
https://jsonplaceholder.typicode.com/todos/{todoId}. - Headers (most of the time, leave these empty): extra information sent with the request. You only need one when the server asks for a key or a sign-in, usually
Authorizationwith the valueBearer {authToken}(the token your app got when the wearer signed in, see Signing in below). - Body: for POST and friends, field names and values. Values can be variables.
JSONPlaceholder is a free practice server: no account, no key, no headers. Make a Number variable todoId starting at 1 and use the address above. For a list, use https://jsonplaceholder.typicode.com/todos?userId={todoId}. For live weather, Open-Meteo needs no key either: https://api.open-meteo.com/v1/forecast?latitude=30.36&longitude=-90.07¤t=temperature_2m&temperature_unit=fahrenheit, then map current.temperature_2m.
2. Try it
Click Try it. The editor sends the request for real and lists every value in the reply as a chip. With the todo address you'll see id, title, completed and userId. Click a chip to map it.
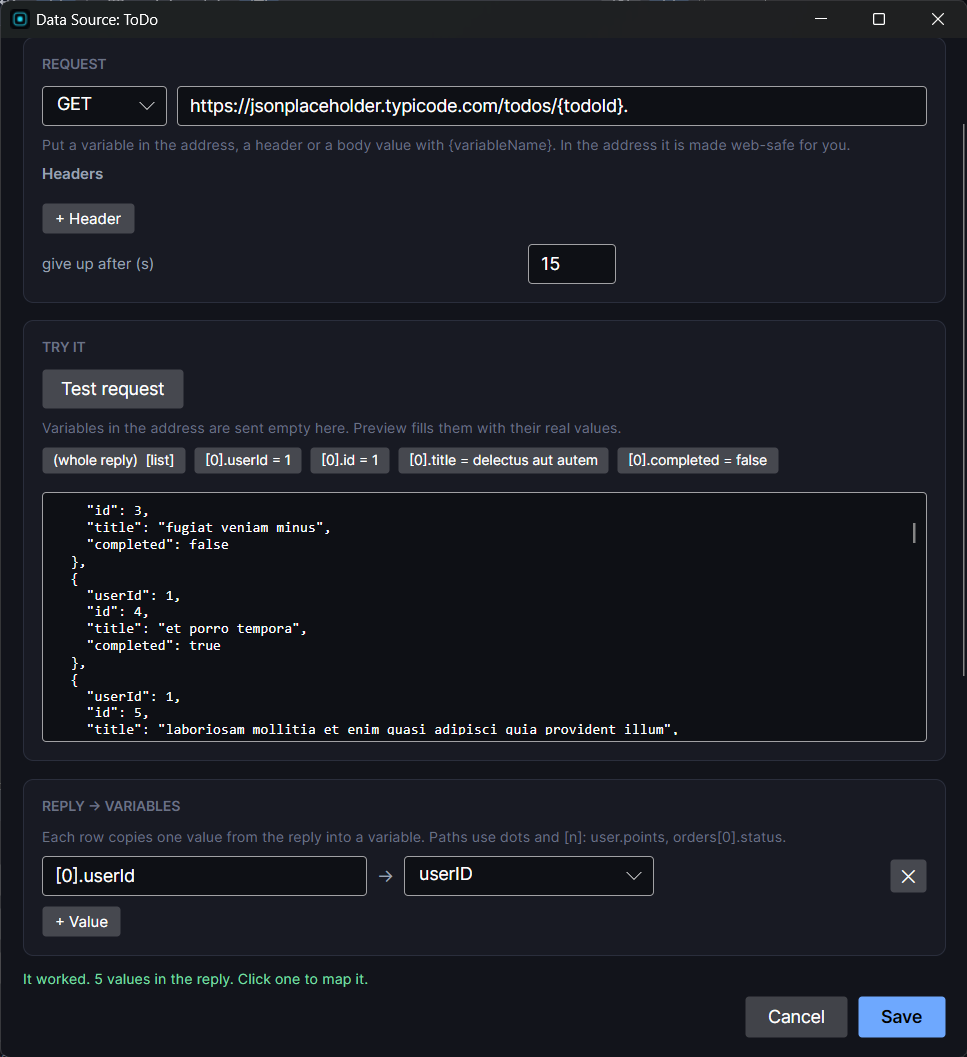
3. Map the reply
- Reply to variables: pick a value in the reply and the variable it goes into (map
titleinto a Text variable, then show it with Bind Text). Text goes into Text variables, numbers into Number variables. Paths likedata.totaloritems[0].namereach into nested replies. - Reply to list: when the reply holds an array (a list of orders), map it into a List. Each item becomes one entry: a name from one key, a number from another, and any of the list's number fields from keys with the same name.
4. Status, errors and events
Pick a status variable. While a fetch runs it reads:
| Status | Meaning |
|---|---|
| 1 | loading |
| 2 | loaded |
| 3 | failed |
| 4 | offline, showing the last good reply |
An error variable gets a short reason when a fetch fails. Each Data Source also has an event name: after a fetch it sends <name>_loaded or <name>_failed, which you can catch with an On Event to buzz, move to another screen or fetch something else.
5. Run it
Add Fetch data (in the Data group) to a button, or to an On Event set to open so the screen loads its data whenever it appears. Use Bind Visible on the status variable to show a spinner or "Couldn't connect" message.
Watches drop their connection often. The last good reply is kept, so a screen shows something useful (status 4) instead of going blank. Design for it: show when the data was last updated, and give the wearer a retry button.
Signing in
The Sign In Form in Add Object's App group is an email box, a password box and a button. The sign-in itself is an ordinary POST Data Source that maps the token from the reply into a secret variable (the lock button on a Text variable). Secrets are stored encrypted on the watch, never go to cloud save, and are never shown in tiles or complications. Later Data Sources send the token in a header.
Tiles and complications update too
After every successful fetch, the app's Tiles and complications redraw with the new values. See Complications and Tiles.