Showing a List
Turn a List into scrolling rows: a Layout, one template row and List Entry, start to finish.
About 4 minutes
A list on screen (a shopping list, a bag of potions, a party of monsters, results from your server) is four pieces that plug together:
- A List holds the data.
- A Scroll group lets it scroll past the edge of the watch.
- A Layout inside it makes one copy of a template for each entry.
- List Entry on the template says which part of the template shows which part of the entry.
This page builds a simple one start to finish.
1. Make the list
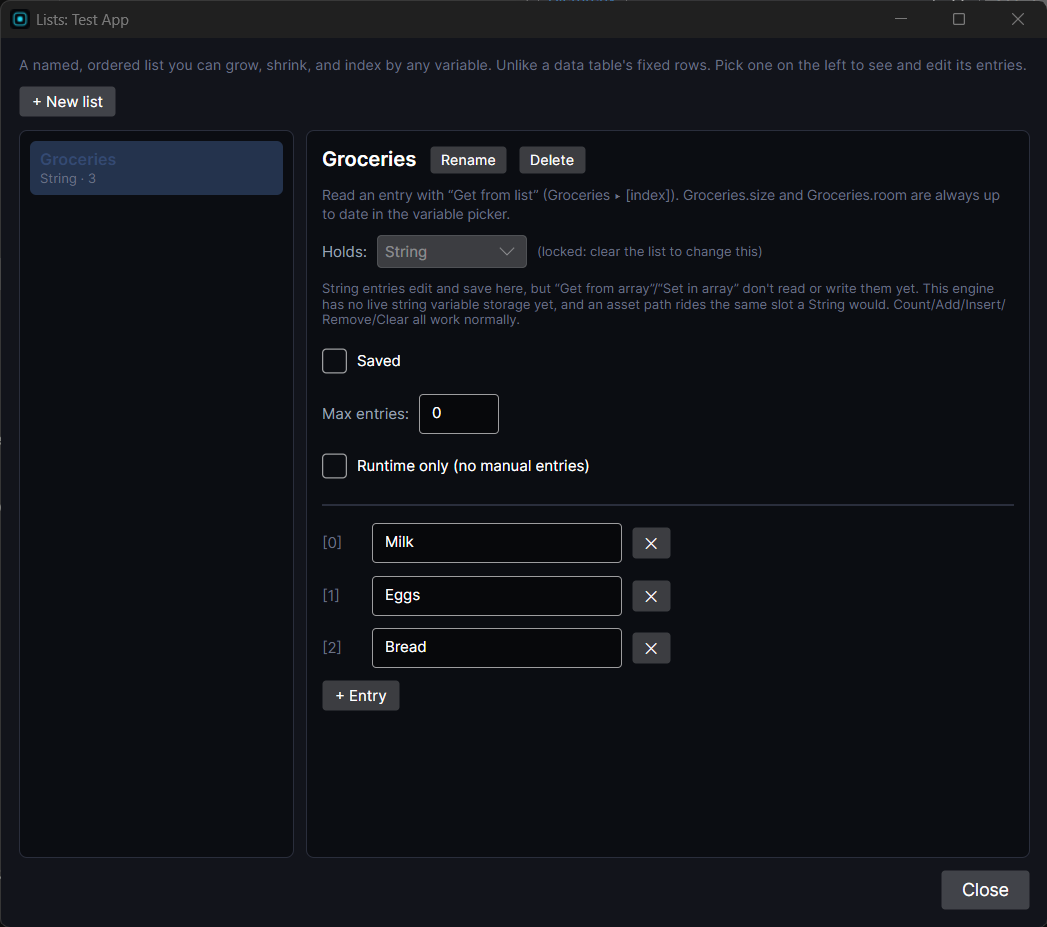
Open Window ▸ Lists… and click + New list. Pick what it Holds:
- Text, Number or Bool for a simple list of values:
Milk,Eggs,Bread. - Data objects when each entry has several parts (a name, an icon, a price). See Saving Objects and Lists.
Add a few entries with + Entry so you have something to see. If the game fills the list while playing instead, tick Runtime only (no manual entries).
2. Make the scrolling area
Add an empty object to your screen, size it to the area the list should fill, and add Scroll to it (Add Component ▸ Scroll). Scroll clips anything outside the box and lets the crown or a drag move it.
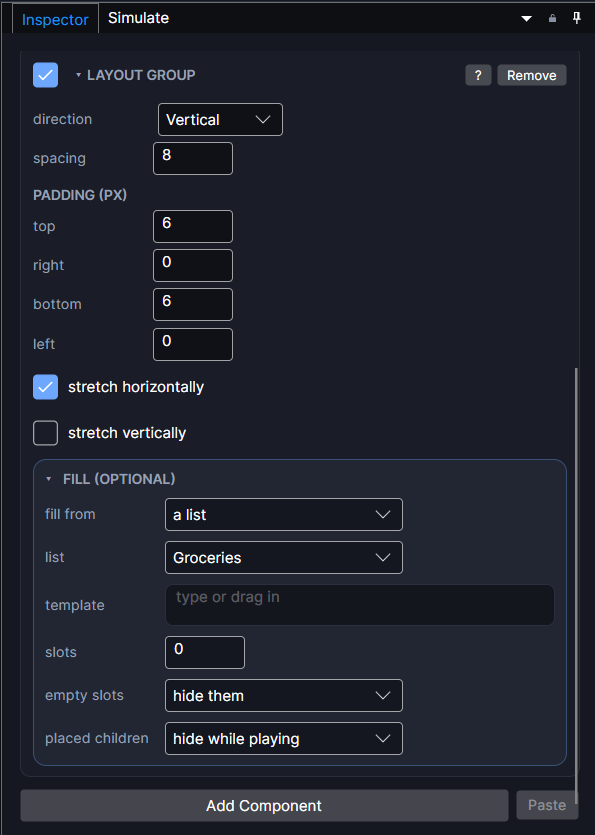
3. Add a Layout and pick the list
Add Layout to the same object (or Grid Layout for a grid of tiles). Set direction to Vertical for a column and give it some spacing.
Open its Fill section:
- fill from: a list.
- list: your list.
- template: leave it empty for now. The next step builds the template right inside the layout.
4. Build one row
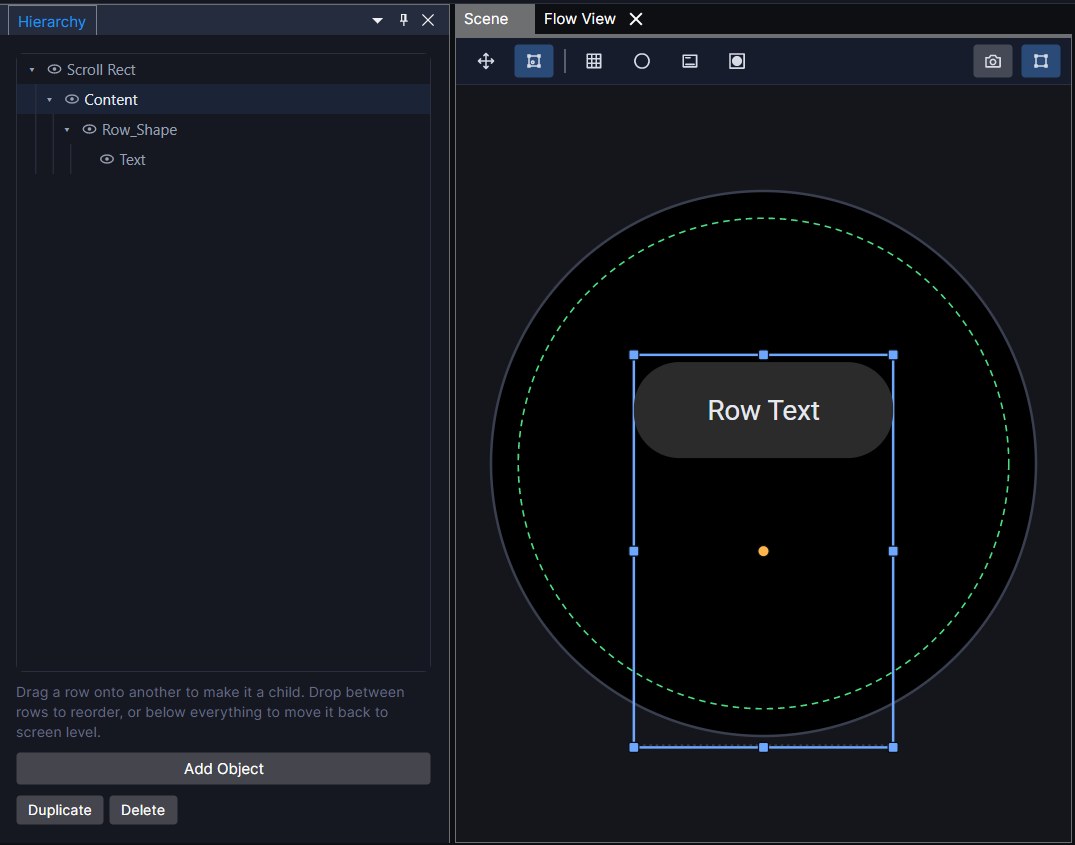
Inside the layout, build what one row should look like: say a rounded Shape with a Text on it. This first object inside the layout is the template. It hides while playing, and the layout makes one copy of it per entry.
Want to use the same row on other screens? Right-click it and choose Create Prefab (Or drag the top level row object and drag it into the project panel), then pick that prefab as the layout's template.
5. Tell the row what to show
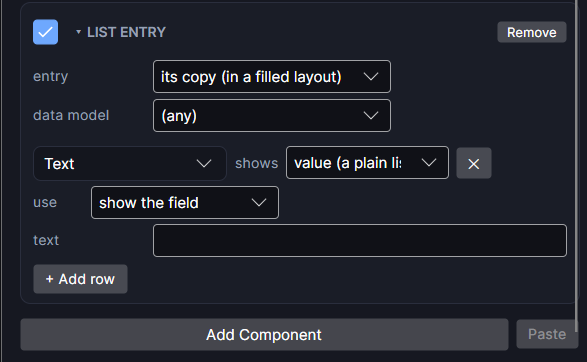
Select the row's top object and add List Entry (Add Component ▸ Binding ▸ List Entry). Click + Add row, then for each row:
- Pick (or drag in from the Hierarchy) an object inside the template.
- Pick what it shows from the entry.
For a Text, Number or Bool list, the Text shows value: the entry itself. For a list of Data objects, a Text can show name or any field (price), an Image shows the icon, and a bar fills from a number (hp, full at maxHp).
A Text row also has a text box: Lv {value} or ${value:.00} wraps the value in words or formats it.
6. Press Play
Each entry gets its own row. Change the list and the rows follow.
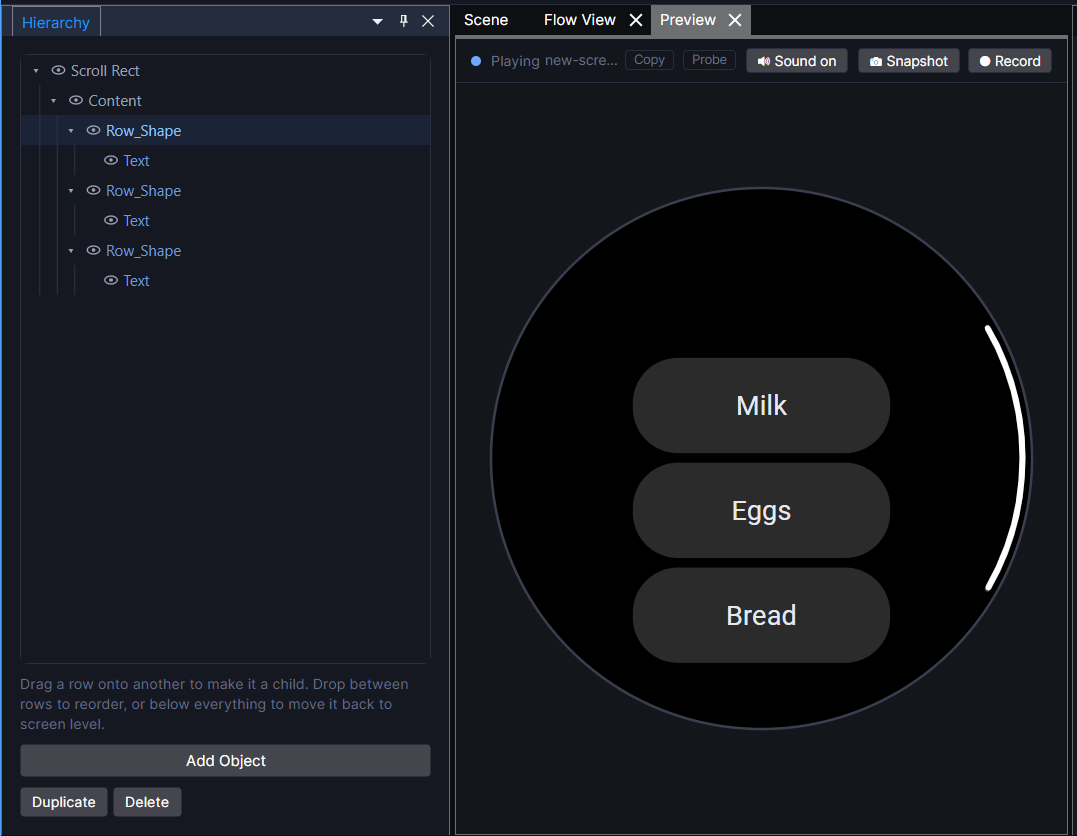
Tapping a row
Tapping a row sets Groceries.selected to that row's position, then runs any tap actions you put on the template. Put a Go to screen on the template to open a details screen. On that screen, a List Entry with entry set to selected in Groceries shows the tapped entry.
Good to know
- There's one row per entry, added and removed as the list changes, so a list of 3 makes 3 and a list of 1,000 makes 1,000. On the watch only the rows in view are actually built, so long lists stay quick. Set max rows on the Layout to show at most that many (a top 10).
- In edit mode you see only your template row. The copies appear when you press Play, and on the watch.
- Text lists show what you typed in the editor; actions can't change their entries yet. Number, Bool and Data Object lists change while playing.